Installation and prerequisites
How to install WSA on a cPanel server, system requirements, update, uninstallation.
WSA installs via a single command ("one-liner") downloaded from Astral Internet's distribution server. This page describes the prerequisites, step-by-step procedure, updating, and uninstallation.
⚠️ Installation requires root SSH access to the server. All commands must be run as
root.
Quick install — one-liner
cd /root && wget https://wsa.cdn.astral360.com/pub/wsa-install && sh wsa-install stableThe last argument selects the release channel — pick one of:
| Channel | When to use |
|---|---|
stable |
Production servers (recommended). Releases tested and validated. |
current |
Production slightly ahead. Recently published stable releases. |
edge |
Beta / staging. Evaluate new features before they hit stable. |
The branch can be changed later from WHM (Module Configuration → Release tier). See §2.2 below for the detailed walk-through.
1. System prerequisites
1.1 Operating system
WSA is compatible with the following Enterprise Linux distributions:
| Distribution | Supported versions |
|---|---|
| CentOS | 7, 8 |
| AlmaLinux | 8, 9, 10 |
| Rocky Linux | 8, 9, 10 |
| CloudLinux | 8, 9 |
| Red Hat Enterprise Linux | 8, 9, 10 |
The install script automatically detects the distribution (rpm -q --qf "%{VERSION}" --whatprovides redhat-release) and adapts commands (yum on EL 7, dnf on EL 8+).
📝 EL 7 is still supported but doesn't get HTTP/3 (limit of OpenSSL packages available). EL 9 and EL 10 are the recommended distributions to enjoy all features.
1.2 cPanel/WHM
- cPanel installed and functional on the server.
- cPanel version 108 or newer (cPanel ≥ 108 includes the required APIs and Jupiter theme by default).
- Apache managed by EasyApache 4.
- cPanel theme: Jupiter (recommended) or Paper Lantern (legacy but supported).
1.3 ionCube Loader
WSA code is encoded with ionCube. The loader must therefore be active on the PHP versions used by cPanel and the system.
The wsa-install script detects ionCube's absence and offers to enable it automatically:
# Manual check:
whmapi1 get_tweaksetting key=phploader
If the output doesn't contain ioncube, the install enables it via:
whmapi1 set_tweaksetting key=phploader value=ioncubeYou can refuse automatic activation, but in that case the install stops immediately — WSA cannot function without ionCube.
1.4 Disk space
| Component | Required space |
|---|---|
| WSA module and dependencies | ~100 MB (/etc/wsa/) |
| nginx cache — Dynamic zone | 512 MB default, configurable |
| nginx cache — CSS/JS zone | 512 MB default, configurable |
| nginx cache — Static/Media zone | 1024 MB default, configurable |
| nginx + module logs | a few hundred MB depending on traffic |
Recommendation: provide a minimum of 5 GB free on /var/ to absorb caches on a multi-tenant server.
1.5 RAM and CPU
WSA adds nginx to the stack. Typical consumption:
| Component | RAM | CPU |
|---|---|---|
| nginx (4 workers) | ~50-100 MB | < 5% steady |
wsad daemon (Perl, inotify watcher) |
~30 MB | negligible |
No specific CPU requirement — WSA runs on any server where cPanel already runs.
1.6 Network and firewall
- Public ports 80 and 443 must stay open.
- Apache will be reconfigured to listen on internal ports 8080 and 8443 (handled automatically by the installer; no manual intervention).
- If HTTP/3 is enabled later: UDP port 443 is opened automatically by WSA (CSF or firewalld auto-detected).
- For first install, the server must be able to reach
wsa.cdn.astral360.comandactivation.astral360.comover outbound HTTPS (activation enrolment + verified source downloads).
2. Installation procedure
2.1 Connecting to the server
Connect via SSH to the server as root:
ssh root@your-server.example.com2.2 Download and run the script
A single command launches the full install:
cd /root && \
wget https://wsa.cdn.astral360.com/pub/wsa-install && \
sh wsa-install stable
The last argument (stable) selects the release branch. Four choices:
| Branch | For whom? |
|---|---|
stable |
Production. Tested releases, recommended for production servers. |
current |
Production slightly more up-to-date. Recently published stable releases. |
edge |
Beta. For test servers or evaluating new features before publication. |
dev |
Development. Reserved for the Astral Internet team. |
💡 The branch choice can be changed later from WHM, Module Configuration page.
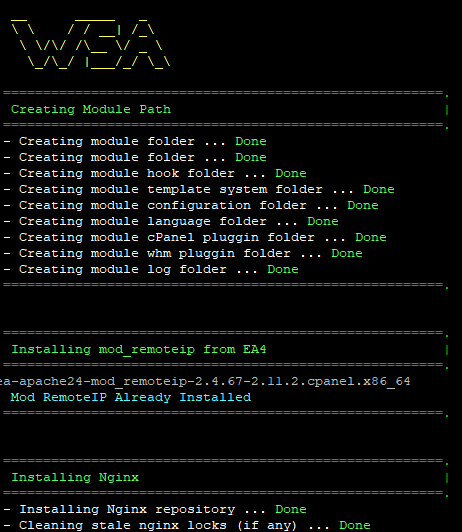
2.3 What the installation does
The install proceeds automatically in several steps, visible in the terminal:
- ionCube check — activation prompt if absent.
- Module download and Composer dependencies.
- Directory creation
/etc/wsa/,/var/log/wsa/, etc. - nginx install from the official repository.
- cPanel hooks configuration (SSL renewal, account suspension, etc.).
wsaddaemon startup (real-time monitoring).- WHM plugin registration (icon in the admin panel).
- cPanel plugin registration (icon in the customer panel).
- First nginx configuration generation and service restart.
- Internal cron tasks activation.
Typical duration: 3 to 8 minutes depending on network speed and server size.
2.4 Optional nginx modules (Brotli, HTTP/3)
The installer only deploys and enables WSA — since 2.3.0 it never
compiles optional nginx modules, which keeps the install fast and reliable.
wsa-install takes a single argument: the release channel
(stable — the default — / current / edge / dev).
Build Brotli (or HTTP/3) on demand after installation, from WHM → Nginx Build & Modules, or from the CLI:
/etc/wsa/wsa --nginx-install=brotli --verboseEarlier versions offered
--with-brotli/--skip-brotliflags and an interactive Brotli prompt during install. They were removed in 2.3.0: the multi-minute Brotli compile could race the post-install activation, and a module built against the freshly installed stock nginx could mismatch and breaknginx -t. Build Brotli when you're ready, from WHM.
3. Post-install verification
3.1 Service status
# nginx running
systemctl status nginx

# wsad daemon active
systemctl status wsad.service

# Apache moved to 8080/8443
ss -tlnp | grep -E ':(80|443|8080|8443)\s'
# Should show nginx on 80/443 and httpd on 8080/8443
3.2 WSA status via CLI
# Installed version
/etc/wsa/wsa --version

# Module overall state
/etc/wsa/wsa --status

# Cache verification (on an existing site)
curl -I https://example.com/ | grep -i cache-status
# Should show: X-Nginx-Cache-Status: HIT (or MISS on first call)
3.3 Graphical interfaces
- WHM: Plugins → WSA – Cache for cPanel server (orange WSA icon at the top right of the plugins list).
- cPanel of any user account: Software → WSA - Website Accelerator section.
If an icon is missing, see Install troubleshooting.
4. Updating
4.1 Automatic update
When Auto Update is enabled in WHM (Module Configuration → Automatic Update), WSA checks daily for the latest available version on its branch (stable, current, edge) and installs it in the background.
The operation happens without service interruption:
- New version downloaded to a temporary folder.
- Atomic source code replacement.
post_update.phpscript execution (SQLite migrations, cleanup).- nginx reload.
4.2 Manual update
To force an immediate update (CLI or WHM Update WSA button):
/etc/wsa/wsa --update --verboseThe streamed output displays each step. Count 30 seconds to 2 minutes depending on target version.
4.3 Changing release branch
From WHM: Module Configuration → Release tier → choose stable, current, edge or dev → save.
The next update (automatic or manual) will fetch the latest version of the chosen branch. Warning: moving from stable to edge may install an untested beta; make a backup first if the server is in production.
5. Troubleshooting
5.1 The wsa-install script fails at the ionCube step
Error:
- Activating Ioncube ... FailedCause: your cPanel account doesn't have whmapi1 permissions, or the server is in CloudLinux mode with PHP wrapped by CageFS.
Solution:
# Activate ionCube manually via cPanel WHM web UI:
# Home → Server Configuration → Tweak Settings → PHP loader → ioncube → Save

# Then re-run the installer (re-download in case the script self-removed)
cd /root && wget https://wsa.cdn.astral360.com/pub/wsa-install && sh wsa-install stable
5.2 503 error on sites after install
Typical cause: Apache couldn't switch to ports 8080/8443 — another service is already using those ports.
# Identify the process
ss -tlnp | grep -E ':(8080|8443)'

# Once identified and stopped, restart Apache
systemctl restart httpd
5.3 The WSA icon doesn't appear in cPanel
Typical cause: the plugin wasn't registered or the per-user cPanel applications cache wasn't invalidated.
# Re-register the plugin
/usr/local/cpanel/scripts/install_plugin /etc/wsa/conf/wsa.tar.gz --theme=jupiter
/usr/local/cpanel/scripts/install_plugin /etc/wsa/conf/wsa.tar.gz --theme=paper_lantern

# Rebuild icon sprites
/usr/local/cpanel/bin/rebuild_sprites

# Clear user caches
find /home/*/.cpanel/datastore -name 'AVAILABLE_APPLICATIONS_CACHE_*' -delete
5.4 Install logs
The install writes to several places useful for diagnosis:
| File | Contents |
|---|---|
/var/log/wsa/wsa.log |
Main module log (all operations) |
/var/log/wsa/install_plugin.log |
install_plugin output (cPanel registration) |
/var/log/wsa/install.log |
Log of initial install.sh |
/var/log/nginx/error.log |
nginx runtime errors |
6. Uninstallation
WSA can be cleanly uninstalled at any time. Uninstallation fully restores the original Apache configuration — your sites continue to function without interruption.
6.1 Procedure
In root SSH:
/etc/wsa/install/uninstall.shThe script:
- Disables the WSA module (
wsa --disable) — nginx vhosts uninstalled. - Removes WSA cron tasks.
- Uninstalls cPanel Perl hooks.
- Stops and removes the
wsaddaemon. - Uninstalls nginx (RPM package).
- Unregisters the WHM and cPanel plugin.
- Removes
/etc/wsa/directories and log files.
Apache automatically reclaims ports 80 and 443.
6.2 Advanced uninstall options
By default, uninstallation preserves:
- The
/etc/ssl/certs/dhparam.pemfile (generated during install). - Any nginx configuration modifications installed by the admin (under
/etc/nginx/).
For complete removal:
/etc/wsa/install/uninstall.sh
rm -rf /etc/nginx/  # only if you no longer use nginx
rm -f /etc/ssl/certs/dhparam.pem
7. Special cases
7.1 CloudLinux + CageFS
WSA is compatible with CloudLinux. The install automatically rebuilds the CageFS skeleton when the ea-apache24-mod_remoteip module is installed.
7.2 Server behind NAT
WSA detects servers in 1:1 NAT via the /var/cpanel/cpnat file. The public IP is used for license validation and update downloads.
7.3 Migration from a legacy version
If you update from a pre-2.1.0 WSA, the post_update.php script automatically migrates:
- Old per-user JSON configuration files
- The old SQLite database (adds new columns).
- Pre-loaded bot lists.
No manual intervention is necessary.
Further reading
- What is WSA? — Understand what the module does before installing.
- WHM dashboard — The entry point after install.
- Command line — Complete CLI reference for automation and troubleshooting.